
Pitching My Idea – 29th March 2019
I had to present my idea for my FMP to other members of my mentor group and I had to sell the idea that I chose to create. After discussing the project I wished to create, I received most positive feedback, with some constructive criticism from my peers which I had to work on.
What I Need To Improve On
I was advised to research further into what documentary style I would be applying to my work. To do this, I will be researching different documentaries and learn more about how they are created. I was also advised by my peers to research ‘Voice of God’ to learn more about what goes into creating a documentary. Finally, I was advised to consider how the documentary was going to be edited. This project will be the longest that I have worked on, so myself and my group have appointed members with particular sections to edit. After we have edited our sections, we will compare our work and compile the edited sections to create the documentary, adding any necessary changes.
What Went Well
When presenting my work, I was praised for the way I set out my blog. Members of my peer group liked that my website was organised as it made locating work an easier task. Another feature I was praised for was the content of my blog. Although some parts needed work, the majority of my work on my blog was great.
Idea Generation
Topics We Could Choose:
- Re-tell, reboot, reimagine
- Fake news
- Screen life
- Discarded
- The role of the Observer
In today’s society and with the digital revolution we are constantly observing and being observed.
Analysing the various topics which I could use for my FMP, there were mutliple ideas which I believed I could have created. Although I was happy to work alone, I also discussed the ideas with my friends and we then decided to work together as we all had good ideas to contribute to the project.
Idea 1 – Bruce Almighty
For our project, we first considered covering the topic of re-tell, reboot or reimagine.
Generating ideas for what we would like to recreate, we considered various movies. One movie that we almost chose to recreate scenes from was ‘Bruce Almighty’. Due to the story of this film (a man gaining powers of a God), there were a lot of scenes that had potential to be remade. One scene we particularly liked was the following:
At the start of this video, the protagonist is seen walking on water, an effect that was portrayed very well in the movie. Wanting to learn how this effect was produced, I searched YouTube to see if there were any tutorials available showing how to create this effect. Thankfully, there was. The following tutorial showed me how this effect could have been created.
In the tutorial video, the video-maker, ‘Jordy’ created a wooden board that could placed in the water and later walked on it to create the effect. Jordy ran into a problem when creating this video as the wooden board floated when one side of it was stood on. To overcome this issue, he attached rocks to the board to ensure it wouldn’t float. After this, Jordy filmed him walking on this board in the water with part of the shore being visible in the recording.

After this, Jordy recorded the lake on it’s own, with no shore present in the video. In Premiere Pro, he then showed how by placing the video layer with just the water above the walking on water layer, it could then be merged together using feathering to create this realistic and believable effect.

This was a surprisingly easy effect to recreate, however, we decided against recreating Bruce Almighty due to other ideas we had in the idea generation process.
Idea 2 – Star Wars
Another film I considered remaking a scene from was ‘Star Wars: The Phantom Menace’. Being a huge Star Wars fan, I wanted to recreate a fight scene between the characters ‘Qui-Gon’ and ‘Obi-Wan’ against the villainous ‘Darth Maul’. The following is the scene that I wanted to recreate:
Visually, this scene is pleasing as the characters take part in a huge battle and seeing the effects of the lightsabers adds to this scene looking visually good. I also wanted to recreate this as the music and foley used adds to the tension of the scene. Thinking about audio elements to create for my FMP, this would have been a good scene to recreate, however I preferred other ideas when discussing them, so decided not to make my own version of this scene for my FMP.
Wanting to learn how to create the effect of a lightsaber, I searched for a tutorial on YouTube. The following video is the tutorial that I researched:
In this tutorial, the creator of the video shows how this effect is made using masking layers on After Effects. Not knowing a lot about After Effects, this did deter me from recreating this scene, however, eager to overcome my lack of knowledge, I watched the video to further learn how to make this affect. Overall, after learning how to create this effect, I don’t think the scene would have been too difficult to recreate, however, due to us preferring a different idea from the idea generation process, we chose not to recreate this scene from Star Wars.
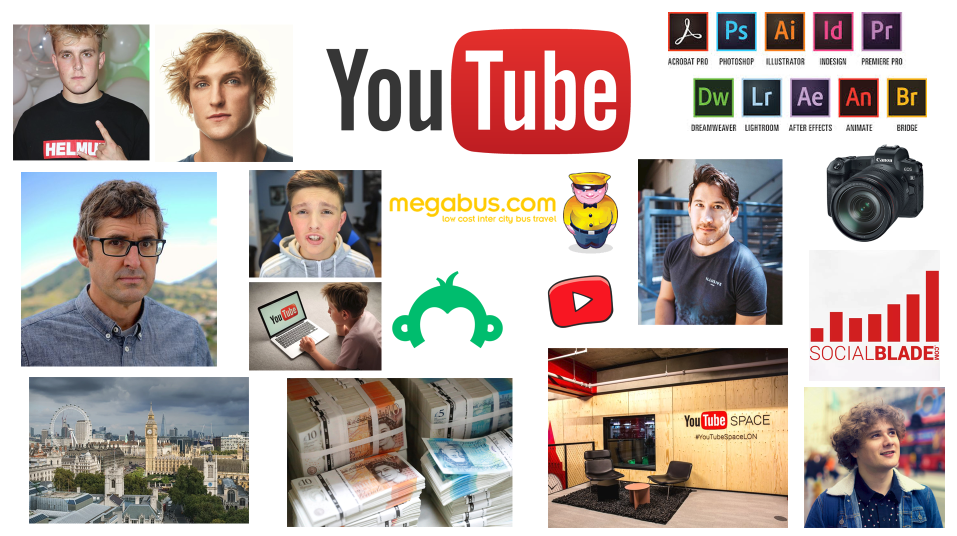
Idea 3 – YouTube Documentary (My Chosen Idea)
When considering the topic of screen life, I started to think about how an idea could be applied to a general audience. I began to generate ideas for what social media platforms people use the most and being an avid user of the platform ‘YouTube’, I became invested in the idea of creating a documentary centralized on this platform. As a group, we further discussed the potential of YouTube being our chosen idea to create a documentary about. Applying everyone’s prior knowledge and experiences on the website, we decided it would be a good basis for a documentary to be made about. As well as this, with us all of us having had good experiences on the website, we wanted to learn more about the negative side of YouTube. With the topic of YouTube, there is a lot of potential in terms of primary and secondary research. For primary research, our group intends to create questionnaires and interview a YouTube creator who makes a living on the website. As for secondary, YouTube itself offers various videos and content creators to explore, whereas we also intend to educate ourselves more on the layout of a documentary by researching some. Our documentary will be roughly between 10-20 minutes long. Although there is a lot to cover on this topic, we don’t want to drag on any points for longer than required and instead, get into each point in full detail in good time. Also, if our documentary is too long in length, viewer abandonment is more likely to occur as not everyone may have the time to watch a long documentary about YouTube.
When we decided on our chosen idea, we also thought of a USP that would apply to our work and help it stand out. We had multiple ideas, but settled on two USPs which included visiting YouTube Space in London and interviewing YouTubers who work full-time as creators.
For our documentary, we also chose to create individual mood boards and storyboards to generate more ideas for the project and decide what we would discuss in the documentary.


Reflecting on how long it took us to choose an idea for the project, we didn’t take a lot of time to settle on the idea of creating a documentary. At this point in the creation of the project, we also decided to create a project plan in order to acknowledge deadlines which we would have to adhere to and complete work by.
Primary Research
For the FMP, everyone had different ideas on what they wanted to create their projects about and because of this, this meant that everyone needed to complete different research.
Working in a group, we decided that for primary research we would need to collect information from two different age groups – younger and older audiences. Since we could easily get in contact with older generations via social media, we decided that we would approach a primary/secondary school to gather information from a younger audience. Initially, we planned to attend a class to hand out questionnaires to children in order for them to complete the questionnaires so that we could later analyse and compare the results. To do this, we needed to reach out to a school to request a visit of this nature. Due to convenience of the school being located a close distance away from the college, we approached ‘Dwr Y Felin’ school with this request. We conducted an email to request a visit:

After the visit had been requested via email, we then created the questionnaire which we wanted the young audience to complete, which is attached below:
https://hanwilliamsmediahome.files.wordpress.com/2019/06/pupil-questionnaire-1.pdf
After completing the questionnaire, we decided that if we were to attend a class to talk to a younger audience, we would need to create visuals in order to keep the young crowd interested in the topic we were talking about. Collectively, we worked on a presentation to show whilst we spoke about the topic of ‘YouTube’ for our project.

Link to our finished presentation:
https://hanwilliamsmediahome.files.wordpress.com/2019/06/dwr-y-felin-documentary-powerpoint.pdf
Unfortunately, the school denied us the chance to attend a class to hand out questionnaires due to our request being short notice, so this left us with a problem to overcome. We needed to decide how we would collect information from a younger age group, so our solution was to create the questionaire using the ‘SurveyMonkey’ website and then sending the questionnaire to younger members of our families. Although at the time this was the best solution to our problem, it did mean that we didn’t receive as many results as we had hoped or anticipated. In the future, I will consider the amount of notice a school needs for a visit request of this nature or alternatively, I will seek other solutions to overcome the problem. Primary research from a younger audience was crucial due to the nature of the documentary and one of the sections in the documentary focusing on YouTube’s influence on children.
Using SurveyMonkey’s services once again, we created another questionnaire, this time aimed at investigating what older generations thought about YouTube. Unlike with the children’s questionnaire, we received a large amount of feedback and results which we could later analyse. We shared the questionnaire we had created on our social media platforms and due to us being connected with older audiences, not surprisingly, this is why we received a lot of feedback. In future projects, receiving a similar amount of responses on different questionnaires is something I should improve on. I will improve on this by researching different methods of collecting information. One alternate option we discussed in our peer groups was to print off copies of the questionnaire to hand out to lecturers in our college. Another reason why this alternate method might have been better is because of the age groups that completed the questionnaire after we shared it on our social media platforms. Due to us mainly being connected with people of our own age group, the majority of the people who completed our questionnaire fell under the age category of 18-24. Although the results were still helpful, they would have been fairer had members of other age categories completed the questionnaire. By handing out questionnaires to college lecturers and staff, this is how we would overcome this problem.
Overall, the feedback and results from the questionnaires played an important role in the creation process of our documentary. After analysing the results from both questionnaires, we could determine which YouTube stars we would need to investigate, these mainly being ‘Jake Paul’ and ‘Logan Paul’.
Since we were in the process of creating a documentary, our group also decided that we would need to complete documentary research. To do this, each member of our group researched the different styles of documentaries individually and we watched one documentary each to analyse what style it was captured in. The documentary I researched was created by well-known documentary-maker, Louis Theroux and it was titled ‘Louis Theroux: Dark States – Murder in Milwaukee’. In this documentary, Theroux explored Milwaukee (an area in Wisconsin) which is known for it’s high death rates due to extreme gun violence. The local community in Milwaukee believe that police brutality is a big problem in the area, with police disagreeing and ensuring they do their best work to protect the community against gun violence. Watching this documentary, I deemed it to be unbiased due to Theroux and his team not agreeing with one side, however, fairly interviewing members of both groups. The documentary was captured in the style of an expository documentary and presented facts and stories of local events that had occurred in the Milwaukee area. After watching this documentary, it gave me ideas for ways I could present my documentary and made me believe that for my documentary, the most appropriate style to capture it in would be in expository. I think this because this style allows for a fair conclusion to be made, after interviewing and researching members/individuals on both the good and bad sides of YouTube.
Due to myself concentrating on fully completing the context page on my project, I did fall slightly behind on my project plan. In total, I began working on primary research two weeks behind what had already been planned on my project itinerary. This did not effect the outcome of my project.
Secondary Research
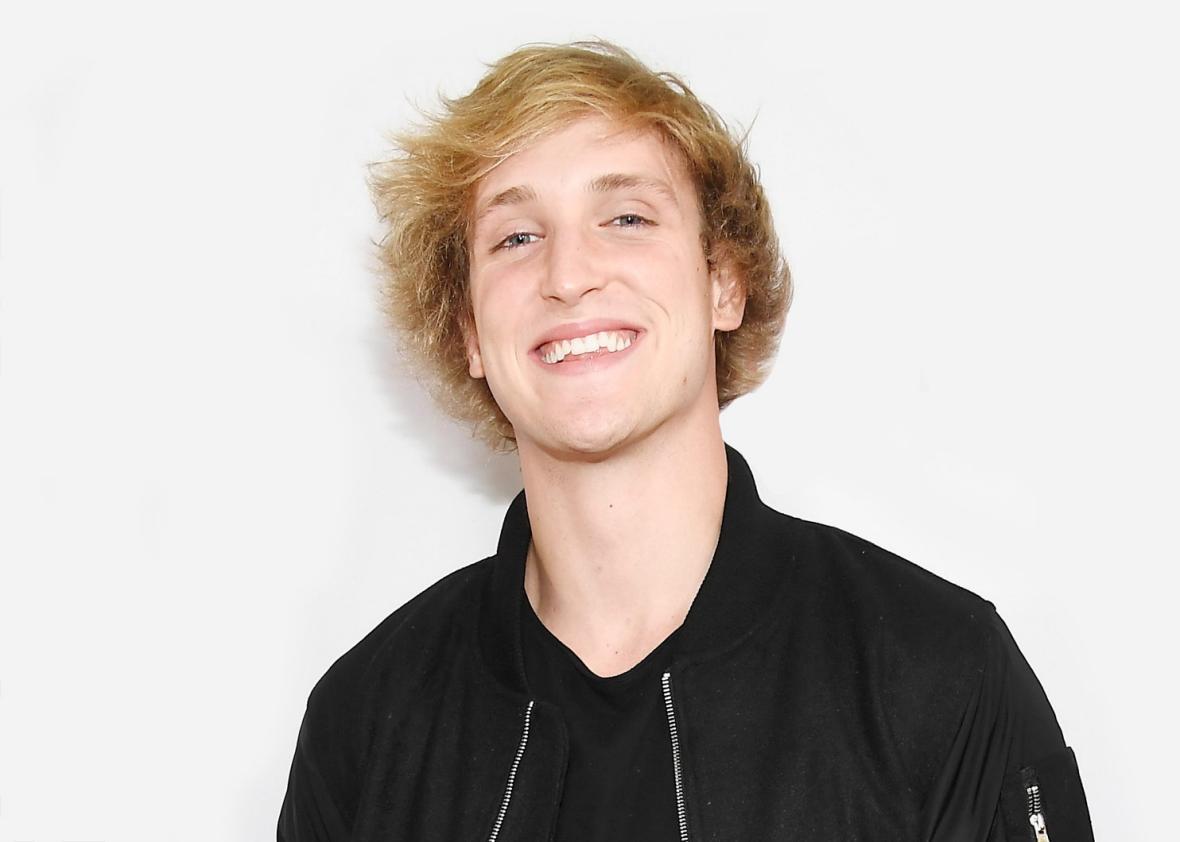
When creating a documentary about YouTube, we decided to include multiple sections and topics. One of these sections discussed YouTube’s influence on children. From the questionnaires and primary research we had completed, we discovered the creators who children watch the most and chose to research more about them as creators. As previously stated in the primary research section on my evaluation, two YouTubers whose names often occurred were ‘Logan Paul’ and ‘Jake Paul’. As a group, we decided to investigate one controversial YouTuber each to analyse their careers and what type of audience they maintain. I researched the work and life of Logan Paul and discovered how his controversial actions led to a decrease in viewership and subscriber growth. Prior to him creating any content that received serious backlash, Paul was thriving on YouTube, however after he disrespected a suicide victim in one of his videos (posted December 31st 2017), he was forced to take a break from his social media platforms and later returned with the intent to support suicide victims by donating a large sum of money to various charities. What I’ve learned from researching Logan Paul is that no matter how large of a fanbase a YouTuber has, no one is safe from backlash when it relates to serious controversies.
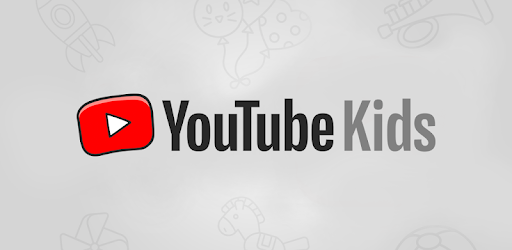
After researching the work of Logan Paul, the controversies surrounding his channel and how he maintains mostly a child-based audience, I then decided to research more into YouTube’s child audience and the safety precautions set up by YouTube to stop any abuse against children on the website. When researching about how children use YouTube, as well as finding facts and statistics from reliable websites, I applied what I had learned from analysing the results of our questionnaire that were answered by a young audience. As well as researching the safety precautions that were set up by YouTube, I decided to investigate why they were set up in the first place. Due to a lot of children using the website, YouTube decided to create an app aimed at the young audience where there would be no explicit content shown. This app was known as the ‘YouTube Kids’ app and aimed to share advertiser-friendly videos with children to watch without parents needing to intervene to monitor what content their children watch. In theory, this app was a good addition to YouTube, so that watching videos online would be more inclusive to a younger generation, however over time many flaws have been discovered with the ‘YouTube Kids’ app. Researching ‘YouTube Kids’, I learned of the multiple controversies and concerns that have been raised by parents. One of the biggest problems that has been discovered on the ‘YouTube Kids’ app is the inclusion of non child-friendly content. The whole point of the app is that children can watch videos that do not include any explicit behaviour, however at times throughout the children’s app’s history, there have been multiple bad videos that have been reccomended for children to watch. YouTube have responded to these claims by including stricter rules for videos to be uploaded to the app, which in turn has given the app back some of it’s credibility.
I also discovered other controversies related to children on YouTube in the process of researching for this documentary. I learned that for a long period of time, a large majority of family-oriented YouTube channels had to have their comment sections disabled due to action taken by YouTube when it was discovered that a lot of predatory comments were being made in the family channel’s comment sections. Understandably, these comments received a lot of controversy, which in turn led to advertisers pulling away from promoting their brands on YouTube. To minimise brands leaving YouTube and the backlash of the predatory comments, this is why YouTube was forced to take action by disabling comment sections on family-orientated channels.
What I have learned from researching children’s use of YouTube and the ‘YouTube Kids’ app is that YouTube isn’t always the safest place for child-friendly content and that a lot of controversies have taken placed because of this. I also learned how quickly and effective YouTube’s responses are to problems, in order that they can create a website for everyone to use. To conclude, I believe that even though YouTube do their best to stop threats against it’s website and protect it’s audience, parents should also be careful and monitor their children to see what content they watch.
After researching YouTube creators like Logan Paul and Jake Paul. we decided that as a group it would be best to research a content creator who isn’t surrounded by controversy and instead focuses on maintaining a child-friendly image. To add to this, we also thought that our YouTube documentary would be more effective if we interviewed at least one creator who made a living on the website. We searched for YouTubers who we could interview and approached many to ask and thankfully, one YouTuber (who maintains a child-friendly status) accepted our interview offer. This YouTuber is known as ‘Bird Keeper Toby’ and he runs a channel with over 200,000 subscribers. After conversing with Toby via Twitter, we arranged a date for the interview, being Tuesday 16th of April.

Our planned interview went accordingly and we asked the questions we had planned to ask Bird Keeper Toby previously. These questions were:
- Why did you start making videos on YouTube?
- How difficult is it to earn a living on the platform?
- How many hours do you put into creating videos every week?
- What don’t you like about YouTube? Or something you think could be improved on.
- Why did you decide to make your channel based on Pokémon?
- What’s the hardest part of making videos?
- Do negative comments affect you?
- Would you say YouTube is harder or easier than a regular 9-5 job?
- Would you recommend YouTube as a career path for future generations?
- You’ve been to official Pokemon and YouTube events. How do these opportunities arise?
I began working on secondary research a week later than planned due to time constraints after falling behind on working on other parts of my blog. Ultimately, even though I fell behind on work, it did not affect the overall quality of the work that I produced.
Research In Practice
When designating work to members of our group, we all decided that we should create a form of animation each. My responsibility was to create title cards that would appear on screen to introduce a new person that we interviewed for our project.
I created the title cards using Adobe After Effects, a program which I haven’t used a lot in depth in past projects. Even though I hadn’t used the project much previously, I still remembered a lot of what I had been taught already.
I have discussed the title cards I made already in previous segments of my blog, however, I will repeat the process in this part of the blog to reflect on my work and to show how I created the title cards.
First, I created a new composition for the project to be made on.

After this, I used the ‘grid and guide options’ tool to create a guideline for my project. I used this in order to make the title cards proportionate and to ensure they would be placed where they need to be in the finished project.

Next, I needed to create a rectangle to use for the title card. Before doing this, I used the ruler tool to mark out where the shape would be placed. Using this tool was helpful because when I created the rectangle, it would automatically lock to the set guidelines, which in turn made my work look cleaner.

I then duplicated the rectangle shape multiple times and changed each rectangle a darker shade of red than the other. I did this to add a bit of style and colour to the title card. The reasoning behind why I decided on red was because that colour is heavily connected to YouTube, with the logo and other features of the website being created in that colour.

Next, I added text to the title card. The text represents each person we interviewed for the project. As well as including their real name, I decide to add the name of their YouTube channel, accompanied by the YouTube logo.

After adding text, I was ready to animate my title card. To do this, I had to create a new composition and drag my title card onto the newly-created composition.

I then moved the title card off screen using the selection tool. I did this so that I could begin keyframing and move the title card onto the project. To create a keyframe, I pressed on the blue stopwatch logo and adjusted where each keyframe would go on my timeline.

As this was a basic animation, I only needed to use two keyframes. To create a new keyframe, I selected the blue diamond shape on the bottom-left side of the program. I adjusted these keyframes on the timeline and worked out how far apart each keyframe needed to be.

After completing my animation for the title cards, I rendered the project and then uploaded it to YouTube as evidence of my work.
The animations that I contributed to the project showed me how much time it takes to create work of this level. Animating can be a long process, however at this point in production, I had made up for the time that I had previous fallen behind on, so I was on the right path when comparing what I had completed for the project to my project plan.
Pre-Production
After generating ideas and researching primary and secondary sources, we then had to prepare for production of the project.
Although it wasn’t ideal, some of the pre-production work for our project had to be completed after we filmed the majority of our work for the documentary. This was because for our unique selling point, we decided to visit YouTube Space London and booking time to visit this location was very difficult. The available slots to visit YouTube Space were sooner than the ideal time we would have liked to visit. Because of this, we had less time to work on pre-production and had to sort out travel arrangements and prepare for London.
Preparing for London, we individually created a London itinery so that we would make the most of our time on the visit and get what we needed to get completed done.

As well as the itinery, Hannah was assigned other pre-production work that was essential before our London trip.
Included in ‘essential pre-production work’ was the location reece which would provide further information on where we planned to film for our documentary.

Before our trip to London, we also had to decide on what equipment we needed to take with us in order to book it out. Once again, Hannah created a table for the equipment we planned on taking, most of which we didn’t need to book out due to it being a personally-owned item by someone in the group.

Whilst Hannah and Cheye worked on other pre-production work, I had to arrange the visit to YouTube Space London and sort out travel arrangements.
In order to access the YouTube Space website, you would need to own a YouTube channel with at least 10,000 subscribers (criteria which my personal YouTube channel exceeded) and once I was able to access the wesbite, I booked an appointment for us to visit YouTube Space on April 17th 2019.

After this, I then needed to arrange low-cost transport to London. For this journey, we chose to use the services of the coach company known as ‘MegaBus’. We used the services of this company due to low-costing tickets to London.
As a group, we discussed the best time for us to arrive in London and after agreeing to arrive as early as possible in order to collect B-roll and other types of shots, I then booked for us to arrive at 5AM in London. We returned home at 11:25PM on the same day.

As Hannah was in charge of sorting out the majority of the pre-production work, she also worked on arranging a risk assessment and raised awareness for any potential hazards.


When we returned from London, we then needed to create a script for our documentary. Whilst everyone scripted their individual parts, I was in charge of scripting the shared sections of the documentary, as well as my individual section. I did receive constructive criticism and feedback from other members of my group when I presented the finished scripted sections, which I would then adjust to improve the piece.
After the script had been completed, we put everything everyone had scripted on one document and arranged the script so that each section transition smoothly.
After this, Hannah re-formatted the script. The following is a link to the finished version of the script:
s://hanwilliamsmediahome.files.wordpress.com/2019/06/youtube-beyond-the-screen-1-1.pdf
One final responsibilty of mine was to arrange a time to interview Bird Keeper Toby for our ‘interviewing a YouTuber segment’. The interview was recorded on April 16th and went accordingly.

Overall, pre-production took us longer than we expected when looking back on our project plan, however the time we used was needed to ensure everything had been completed. Reflecting on our work, it was difficult for us to complete some pre-production after the production stage itself, but the problem that was presented was an obstacle that we overcame.
Production
For our project, we had multiple production days, however the most important was April 17th, when we visited YouTube Space in London. Other production days included the following:
- Recording our thoughts on YouTube before making the documentary.
- Interviewing Bird Keeper Toby.
- Our trip to YouTube Space London.
- Recording narration.
- Our thoughts on YouTube after creating the documentary.
Recording Our Thoughts on YouTube Before Making the Documentary
During our first day of production, all we needed to do was record our thoughts on the YouTube platform prior to creating the documentary. It was a fairly simple shoot do to this section of the documentary being unscripted, however we had to ensure that would we were saying made sense and that we didn’t ramble.


The aim for our project was to create an unbiased and objective documentary, however we decided to dedicate one section at the very end of the documentary to our personal opinions before and after working on the project. We did this to show how our minds had changed after learning more about such a complex platform like YouTube and overall, it did not take away from the documentary being objective in the main sections. Although I agree on including this section, to improve it in the future, I would ensure that we included a scene with all of us comparing and analysing the judgements we originally gave.
Interviewing Bird Keeper Toby
During the idea generation process, we decided that we needed to get the opinion of someone who worked for YouTube as a creator on a full-time basis. As previously mentioned, we decided on interviewing ‘Bird Keeper Toby’.

Preparing for the interview, we generated a list of questions to ask the YouTuber and Toby answered the questions very well and with a friendly, yet professional manner. Toby answered the questions in a way that fit our narrative and that was very informative to the viewer, so I am happy with our choice in who we wanted to interview and the outcome we received. I also believe that when interviewing Toby, my group did so with a professional attitude and because of this we received that answers we were looking for. Going into the interview, I was worried about potential problems with the webcam interview such as reduced quality, however everything turned out just fine. To improve in the future, one option would be to interview a YouTuber in person, however this was something we had plenty of in other segments anyway.
Our Trip to YouTube Space London
One day after our interview with Toby, we headed to London in order to visit YouTube Space to talk with more creators for our documentary. After a long coach journey, we arrived in London at 5AM. We decided to book the early coach so that we had more than enough time to capture B-Roll and other types of shots.

We had to wait 5 hours before YouTube Space opened it’s doors and during this time, we recorded everything we possibly needed. We believe that it’s better to have more footage than you need recorded, opposed to not having recorded enough.
At 10AM, we travelled to YouTube Space London and accessed the building. As we entered the ‘Space Café’ area of the building, we prepared our equipment, ready to record an interview with a YouTuber. As time passed, more and more YouTubers entered the building and we were surrounded by creators who we could interview. Due to these creators having hundreds of thousands of supporters, we were very nervous to approach them, however after realising we needed to capture the interviews for our documentary, we approached the YouTubers and interviewed multiple creators.

When interviewing the YouTubers, we only had access to record in the ‘Space Café’ area, which was an area where music was playing fairly loudly. Because of this, we had to alter the background audio of the interviews in post-production, however one interview didn’t make the final-cut due to the music being too loud.

Our audio issues could have been fixed by recording the interviews using a boom mic, which we did consider taking, however we were concerned about carrying a lot of equipment in London due to damage or theft. We attached an external Rode Shotgun mic to the camera to use to record audio for the interviews.
Recording Narration
Due to us having only one oppurtunity to visit YouTube Space, it meant that we had to complete some pre-production work after we returned home and one part of pre-production that we had to complete after production was creating a script. Fortunately, due to us already having arranged our footage, we knew a lot better what we needed to say in the script.
When it came to recording the narration for our project, we arranged to record in the studio. We booked our time in the studio during one of our audio lessons and due to everyone else needing to record their audio for their FMPs, it meant we only had two hours to record at least 30 minutes of audio.

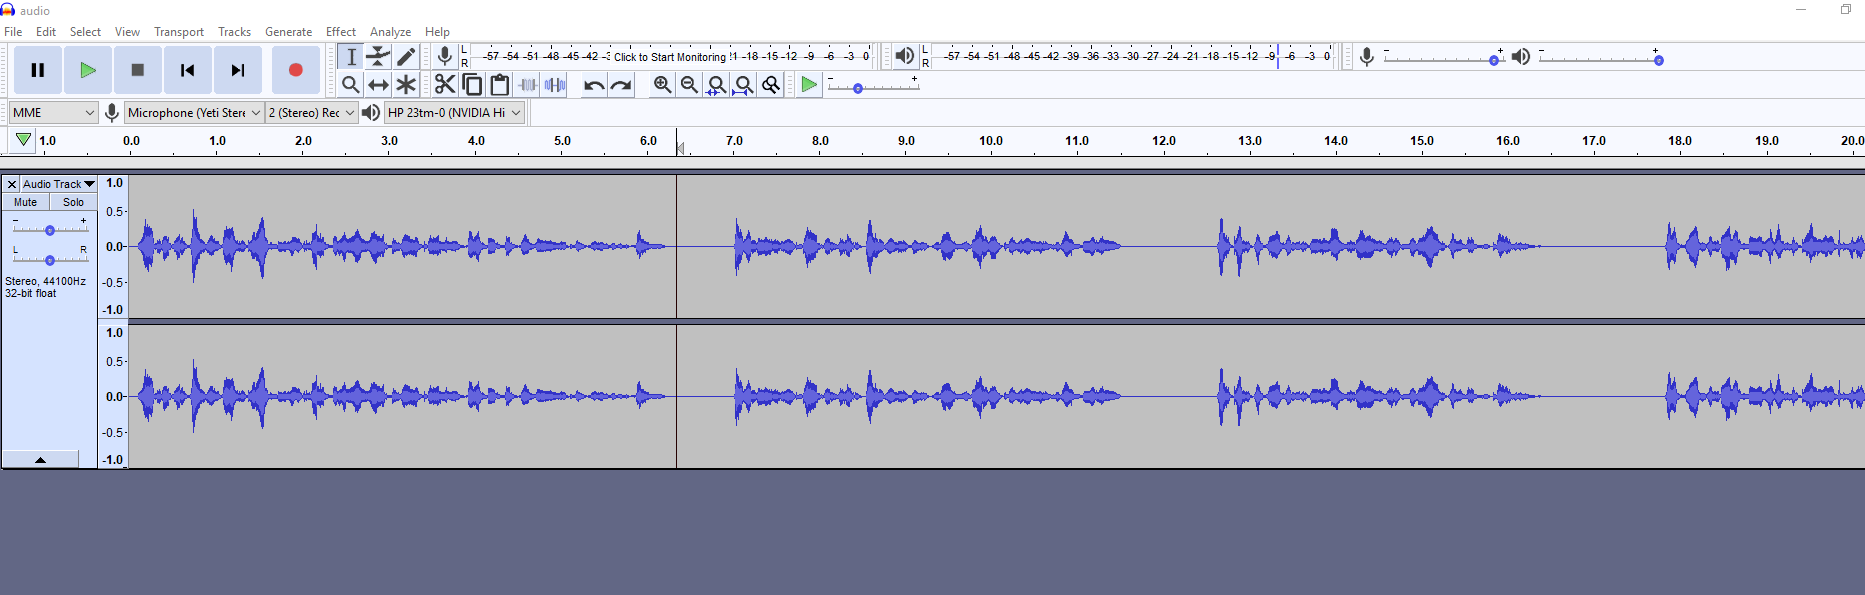
Unfortunately, we ran into various problems when attempting to record our audio. Our problems ranged from the speakers and headphones not working, to the program failing to pick up audio from the microphone. On top of wasting valuable time trying to solve these problems, we also needed to put time aside to power up the studio and turn off all equipment at the end. Struggling due to time restraints and really needing to begin our edits, we decided there would be no point in recording in the studio as we couldn’t get things to work. This left us in a very vulnerable situation, however we used our problem-solving skills and decided to record the audio at my house. Although my setup wasn’t as professional as the studios, I did have a good microphone (Blue Yeti) which we could use to record our audio. Recording at my house also meant that we weren’t pushed for time when it came to other people needing to record. At my house, we used the program ‘Audacity’ to record and edit our audio and listening back to our audio, it all sounded fine.

Whilst we were recording, I was concerned that the audio wouldn’t be great, however it turned out fine. To overcome our problem with the studio in the future, we should allow for more time in advance to record audio and reach out to staff if we needed help.
Overall, we recorded our audio just in time to start post-production, meaning that we didn’t fall behind on the project plan.
Our Thoughts on YouTube After Documentary
After recording everything else, in our last recording session we needed to capture what were our thoughts on YouTube after the documentary. Just like recording our thoughts about the platfrom before working on the documentary, this wasn’t a complex piece to capture as it was not scripted, but jsut our thoughts.


To improve on this section in the future, I would include a scene where everyone in the group came together to discuss their opinions before and after the project in order to give the documentary a better conclusion.
Post-Production
Post-Production was a long and tedius part of the process of creating this project. Everyone in our group used Adobe Premiere to edit and Adobe After Effects for any additional effects that needed to be made. Before we began editing, as a group we sorted through the footage we had recorded throughout the project. We arranged every piece of footage into a ‘good footage’ or ‘bad footage/bloopers’ folder to make it easier to sort through what we could or couldn’t use when editing the documentary.

When editing the documentary, we all agreed on using the same editing style. With this style, we needed to use third party content, so to make sure that all the footage would be easy to access, I created a seperate folder for where all third party content would be stored.

Editing Audio
The program that we used to record our audio is known as ‘Audacity’ and it is a recording program that includes features to edit and alter audio to better the recording.
After we all recorded our audio, it was my responsibilty to use the program to edit the audio and to ensure that no unwanted noise made it into the final version of the edited audio. Using features such as ‘noise reduction’ and ‘equalisation’, I made sure that our documentary’s audio did not feature any buzzing sounds, unwanted background audio etc. And that the audio levels were all equal.
After editing the audio, I made sure that I backed up the audio and sent the files to everyone else in the group.
Keyframes
Although I have used Adobe Premiere for previous project, I have never learned how to use keyframes. For our project, we decided on an editing style that everyone in the group would adhere to and the chosen style included the use of keyframes, so it was important for me to learn how to use this feature on the Adobe program.
In order to create a keyframe, the media that needed to use this feature would have to be selected. Doing this opened the effects panel where keyframes could be created.

After this, I then needed to select the icon which resembled a timer to create a keyframe.

After the first keyframe had been created, I then created another keyframe set after where the first had be placed. To create a second keyframe, I needed to select a different icon, which resembled a diamond shape.

After creating keyframes, this then allowed for me to adhere to our chosen editing style, which overall made the documentary flow better when all edited sections had been combined.
Adding Sound Effects and Background Music
One of the most difficult parts of post-production was finding background music and sound effects that fit the audio or narrative of the documentary. To ensure that the background music suited what was being said on screen, before downloading the background music, I played the music and audio at the same time, then deciding whether to use the music or not.
To download any third party content from YouTube, I used a website known as ‘converto.io’ as it provided top quality downloaded content.
Link to website: https://www.converto.io/en
Can YouTube Be A Career?
Although I edited other sections like ‘our opinions’ and ‘trip to YouTube Space’, the main section I edited was ‘can YouTube be a career’. For my section, I relied on using third party content and keyframes for the majority of the editing process.

As well as using these techniques and following the agreed-upon ediating style, my section also included footage from the interview with Bird Keeper Toby. Editing the interview was very difficult due to myself having to ensure the audio and video were matched due to them both being recorded seperately. Although I managed to solve this problem, I also had to decide what questions we asked Toby made the final cut. We asked Toby a lot of questions, however we couldn’t include the full interview otherwise it would have taken up half the time of the full documentary. After I edited the interview together, I then added it to my section, where I used transitions to make sure that everything played smoothly.
During my edited section, I also had to include the interviews with YouTubers in YouTube Space. These interviews weren’t as difficult to edit together as we only asked the creators the questions we decided on adding to the documentary. The title cards that I had previously created were also made to be included in this interview segment, so I added them into the edit and made sure they didn’t look out of place, once again with the use of transitions.

Once I finished editing my section, I exported it on Adobe Premiere so that it was then ready to be added to the final edit.
Reflecting on how I edited my section, I don’t think there was much to improve on. If I had to edit it again, I would ensure that every animation/keyframe was smooth as some were slightly off at some points, even if it wasn’t really noticeable. I would also make sure I managed my time better as there were some points where time constraints added more preassure to the edit.
Screening
As a group, we had to screen our documentary to three of the tutors on our course. Individually, we each had to go through the context page of our blogs to show the tutors what our project was about. We also had to talk about who our target audience was and our unique selling point, as well as showing any additional information such as storyboards and the idea generation process. After screening the documentary, we were given feedback from our tutors. The following is the positive and negative points they had to say about the project.
Positives
From screening our documentary, we were given mostly positive feedback. The tutors claimed to like the pace of the documentary and they mentioned how it was clear that a lot of effort had gone into our project. As well as this, the tutors also commented on how colourful Hannah’s section was and how it was good seeing as it related to YouTube’s child audience. For my section, the tutors commented on how we asked the right questions in our interviews and they also liked the different cuts we used throughout the interviews. One of the tutors also said they liked how Bird Keeper Toby was very informative, yet still being a bubbly person on screen and that that was likely a result of us choosing to ask the correct questions. In regards to audio, we were concerned that during the interviews at YouTube Space, the background music was too loud, however we tried our best to silence the background audio as best we could. The tutors didn’t actually have anything bad to say about it seeing as we tried to fix to problem and as well as that, they thought it added more of a natural feeling to the interview. Another positive thing that the tutors had to say about the audio was about how the levels were balanced throughout and that the audio was of good quality. This was nice to hear seeing as we were concerned, having recorded the audio on my home microphone and not in the studio. Finally, the tutors commented on how the glitch effect appearing throughout the documentary was good for consistancy and how the bloopers in the credits were a unique touch.
Negatives
Although the majority of feedback we received was positive, we did also receive some constructive criticism. Firstly, one of the tutors spoke about how during the title sequence, the polaroids seemed to move a bit slowly. Although I personally liked it for this reason, how the audience perveices the work is also something that is needed to take into consideration. Another piece of constructive criticism we received when getting feedback for our work was to communicate better when scripting individual parts. The reason this was mentioned was because the same topic was brought up in two different sections. Even though they were mentioned for different reasons, in future projects we should consider if the same topic is nessecary enough to be spoken about again by communicating better. The final piece of constructive criticism we received related to the screen fading to black at some points in the edit. When editing, we felt that at some points doing this transitioned the work nicely to what would be said next and it’s something that we’ll have to consider not including in future projects.
I will take onboard all constructive criticism we received for our documentary for future projects, so that we won’t repeat past mistakes
Final Evalutation On Final FMP Product
Overall, myself and my group completed the goal we set to acheive, which was to find out whether or not YouTube could be a sustainable career in the future, as well as it’s influence on children and the positive and negatives of the website. I also think that our USP of interviewing different YouTubers strongly helped our documentary as we showed what the people who make a living on the platform really think of YouTube.
For the documentary, we also planned to view YouTube from an objective viewpoint and be as unbiased as possible. Whilst there were moments where we may have been leaning one way rather than staying neutral, overall I think we did a good job of staying objective, however to be more unbiased in future projects, it would be a good idea to read over everything that will be shown in the documentary. At the very end of this documentary, we also showed our views on YouTube before and after the project, which I believe we pulled off well, however an improvement that could be made in the future is to also include an additional scene where we come together as a group to discuss the changes in our opinions.
In this project, there have been many occasions in which we have had to use our problem-solving skills. Personally, I think the biggest case of this was when we were recording the narration for our documentary. As previously stated, when we booked out the studio to record, we faced a lot of problems and due to time constraints, we ended up recording the narration with my home microphone. Even though the end result was still good, another solution to having problems in the studio would be to reach out to a tutor to ask for help. Another option would have been to book another sessions later on in the week, however at that moment in time, time constraints meant we needed to have audio recorded as soon as possible.
Listening to constructive criticism for tutors, I agree with everything they said. Even though the large majority of what we had produced was good, it is still important to learn from the mistakes we made. I think the biggest mistake we made was being repetitive at one point in the documentary due to bringing up the same incident twice. This happened due to us working individually on our own parts for the script, so to avoid this problem next time, I will ensure that my group communicates better.
One more thing I will improve on for my next project is collecting more primary research. Even though we received a significant amount of responses on our questionnaire aimed at adults, we didn’t have half the amount of replies on the questionnaire for children. In our defense, we did originally plan to interview a class at Dwr Y Felin, which eventually fell through, however we should have had a better backup plan to ensure we collect more accurate results.
Something I’m happy went well with the project was my individual edit for ‘Can YouTube Be A Career’. I dedicated a lot of time to make sure that there were no problems with my section, even showing it to tutors and classmates to collect feedback and I’m glad I did because any feedback I received, I made sure to add the changes in another edit. When screening the documentary, none of the tutors had any feedback aimed at my section, so I’m happy there was nothing major that I did wrong on my edit.
To conclude, I’m very pleased with the outcome of our documentary. As well as positive reviews from tutors and classmates, I also learned a lot of new skills in the Adobe software. Even though we’ve used the Adobe programs in previous units, it’s this unit that I feel pushed me to my limits and made me want to learn more. Specifically, I have excelled my abilities in Adobe After Effects and Adobe Premiere. In previous units, I didn’t know a thing about After Effects, sticking to tutorials we were shown to create title sequences, however now I feel a lot more capable using the software. I’m also very pleased with my documentary because of the group I worked in. I’ve worked with Cheye and Hannah on every previous unit and that’s because we have a good morale and know when to get work done, contributing ideas and giving each other hoenst feedback. Even though we work well together, we have agreed that on future projects, we need to communicate better on certain tasks. An example of us not doing that in this project was scripting individually, but we will be sure to take this mistake onboard and learn from it. The finished documentary is something we all worked very hard on and we have been happy to hear all the positive feedback.
Finished Edit
The following is the finished edit of our documentary:

Leave a comment